
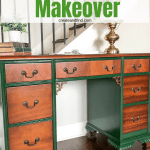
It’s been a while since I painted furniture just to paint. It’s how I got into this whole DIY business and I forgot how much I enjoy just painting. Paint is one of the most affordable tools in your crafting stash. It can work wonders on old outdated pieces, and it’s not hard to learn. I’ve seen a lot of amazing green furniture makeovers lately, and I picked up some hunter-green paint for a vintage desk makeover.
This vintage desk over is one of my favorite furniture makeovers because I used something other than black or white paint.
If you’re thinking about trying furniture refinishing, just start. It’s only painting. Maybe don’t start with Grandma’s precious heirlooms, but search the thrift stores, online yard sales, or even ask your friends if they’ve got anything that’s going to the donation pile.
Related Posts:
- Old Table Makeover
- Handsome Black Dresser Makeover
- Sideboard Makeover
- Antique Chiffarobe using Milk Paint
- Table Makeover
- Board Game Cabinet Makeover with DIY Wood Grain
This desk came to me from a work friend. She’s had it for years, but it was just sitting unused in their bonus room. I added it to my daughter’s room for a bit, but then she decided she didn’t need a desk so back to the garage it went.
I loaned it to a neighbor to help stage their home for selling, and then back to the garage it went. So I decided it was time. I found the most amazing green color in a tiny Rustoleum can for less than $4. Sold!
And I know there are differing opinions on painting solid wood furniture. I have plenty of gorgeous wood in my house that will never see a paintbrush. So if you are a die-hard “don’t touch that wood with paint” fan, you might want to look away now. Or your feelings are going to get hurt in the form of green paint.
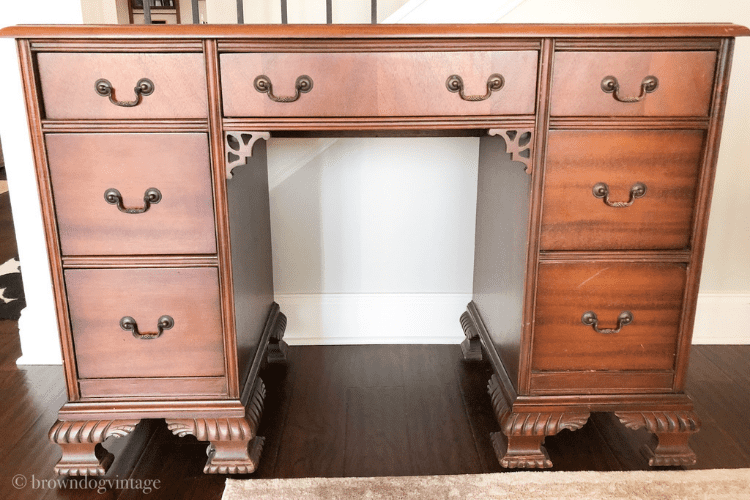
This piece was in fantastic shape and it’s even on casters, but it felt a little outdated even for me. However, I did love the dark wood tones so I decided to keep some of them. The wood needed a little spiffing up, but not much. Nothing was peeling or chipping.
Something like this is the perfect starter piece if you’re just starting out.
Vintage Desk Makeover
Again – warning to look away if you think it’s a shame to paint pretty wood. Here’s what it looked like before:

Supplies Needed for this Vintage Desk Makeover
- Rustoleum Ultra Cover Latex Paint – 1/2 pint in Hunter Green Gloss– I used one from Wal-Mart and it’s less than $4 for a 1/2 pint. I still have some left after doing two coats on the desk
- Restor-A-Finish Dark Walnut – I’ve had this same 16 ounce can for almost 2 years. I cannot rave enough about this product. If you need a touch up on a stained piece, this is it! It dries fast and evenly and works like a champ. Worth every penny and more of the $9 it cost.
- 2-inch good quality brush like this one
- Paint pail and liners – I use these for every project. No kidding – it’s a lifesaver
- Old lint-free rags/cloths for applying the Restor-A-Finish
- A good cleaner – you need to make sure your piece is free of oils and residues before you start, especially if you aren’t priming.
Helpful hints if you’re just starting out:
Clean your piece thoroughly. There’s nothing worse than finally starting to paint and realizing that your paint is just not sticking. Especially if you buy an older piece like this desk – there could be years of Pledge or oils built up that need to come off so your paint will stick.
Gloss paint is harder to paint with. It’s not exactly self-leveling and shows brush strokes more. I rarely paint with gloss for those reasons. It’s also not as easy to touch up. Flat paint and even satin sometimes can be touched up fairly easily – a gloss will show your touch-up lines.
However, gloss looks phenomenal on certain pieces, so sometimes it’s worth the extra effort. I do have a few areas on this one that you can tell where I should’ve left it alone instead of going back over an area with the brush.
If your piece has a slick feel to it you will likely need to prime and/or sand first. If it feels pretty roughed up to start with, you might skip priming. However, for high traffic pieces like a dining table or a dresser top, unless you are using chalk paint, you may want to prime it to ensure your paint sticks to the surface better.
This desk didn’t feel slick and parts of the wood were particularly dried out so I skipped the priming step of this. It was also a dark color over a dark stain, so I didn’t feel the need for the extra step.
If I was painting this one white, I probably would’ve primed it, or else it would have required more coats of paint.
Let the paint cure when you’re done. Be patient. Leave it alone and let it cure. I feel like a total fraud even writing these words because I’m the most impatient person on the planet and I have a hard time with this one. It’s so fun to see and style your newly painted piece, but I’ve learned the hard way on this one.
I didn’t seal this one with anything, but if you are using a sealer like Polycrylic or polyurethane, remember that oil-based polyurethane can yellow over time.
It’s not the best choice in the long run for light-colored pieces unless you like the yellow-tinged look later on. Use a water-based product for those light colors.
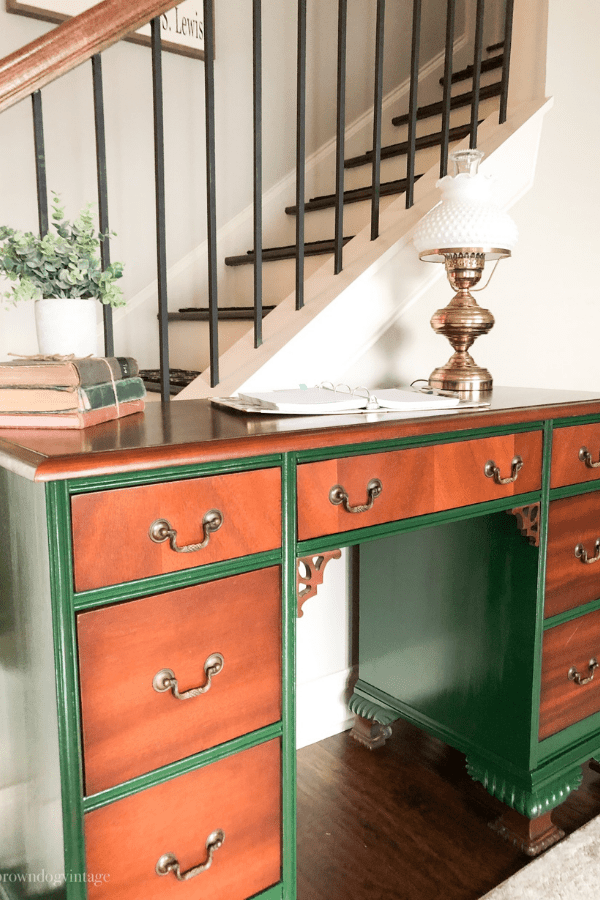
And after two coats of glossy hunter green, here’s my vintage desk makeover!


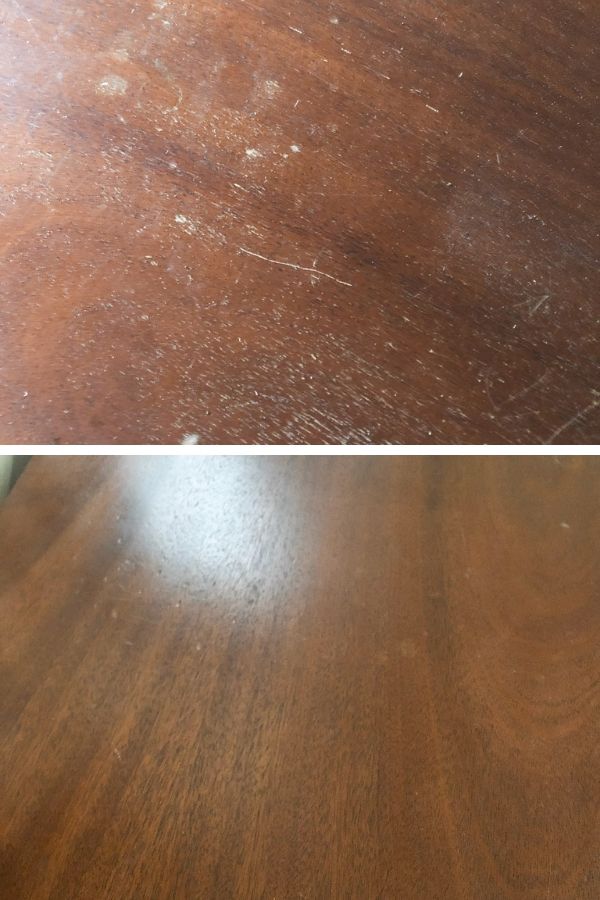
Tips for Removing Scratches

Here’s the power of Restor-A-Finish! I used it on the feet of this dresser and on the top surface. There were tons of scratches and places where the stain had been rubbed off over the years.
You just take a rag, wipe on the Restor-A-Finish and that’s it. It doesn’t completely remove the scratches, but it’s the best product I’ve used that works like this. Unless you want to sand down to bare wood and stain again, this is a fantastic choice.

I’ll admit I don’t use many colors when I’m painting – I tend to stick with neutrals. However, this desk just didn’t seem like a neutral to me and the glossy green makes that gorgeous wood pop even more.
It’s definitely making me want to branch out of my comfort zone and add some more color to my house.
I’d love to see some of your painted projects! Or show me some fun colors you’ve used lately – I’m always looking for inspiration.
Pin for later!

Jake Williams
Sunday 11th of March 2018
Your desk came out great, thanks for sharing.
Melissa
Sunday 11th of March 2018
Thanks - I appreciate that!
janine
Thursday 22nd of February 2018
Melissa,
What a great desk and I love how you transformed it so beautiful. It is wonderful that you found a home for it and also gave it a gorgeous coat of paint, wow! Thanks so much for joining our Friday Friends Parade Linky Party!
Melissa
Thursday 22nd of February 2018
Thanks so much!
Maria - House by the Preserve
Tuesday 20th of February 2018
Wow Melissa! The desk was beautiful to start but the hunger green color just makes it poo. It's stunning!
Melissa
Wednesday 21st of February 2018
Thanks Maria! I'm so glad I decided to keep some of the gorgeous wood tones too!
STEPHANIE ABBOTT
Tuesday 20th of February 2018
Looks absolutely beautiful. Love that green color with wood stain! Thanks for sharing with us.
Melissa
Wednesday 21st of February 2018
Thanks! It was time for some color and now I'm excited about adding some different shades other than white to my house!
Jenny
Friday 16th of February 2018
The desk looks very pretty. I like painting furniture so I think it's good. The wood pops off the green so nicely.
Melissa
Sunday 18th of February 2018
Thanks Jenny. It seemed like just the right amount of paint for this one!